
Understanding Foot Arches and Insoles
Many people rely on insoles for arch support, yet countless individuals still experience foot pain despite using them. As a physical therapist, I’ve observed that most insoles are designed to support only one of the four arches in our feet. In this article, we will explore the four arches of the foot and discuss how to effectively address foot pain through better insole choices and targeted exercises.
The Four Arches of Your Foot
Your foot consists of four distinct arches: the medial longitudinal arch, the lateral longitudinal arch, and two transverse arches. The medial longitudinal arch, which runs from the back to the front along the inside of your foot, is the most commonly recognized and is primarily what most insoles aim to support.
In addition, the lateral longitudinal arch runs along the outside of your foot, while the two transverse arches cross from side to side over the midfoot and forefoot. Understanding these arches is crucial, as supporting them all is vital to maintaining foot health and alleviating pain.
Why Most Insoles Fail
Common insoles often focus solely on the medial longitudinal arch, failing to address the other arches. This lack of comprehensive support can lead to persistent foot pain. Recently, I discovered innovative DeepballFeet insoles that incorporate a built-in metatarsal pad, providing support for both the midtarsal and anterior transverse arches. These insoles also feature support for the medial and lateral arches, along with padding in the heel and forefoot, addressing pressure points effectively.
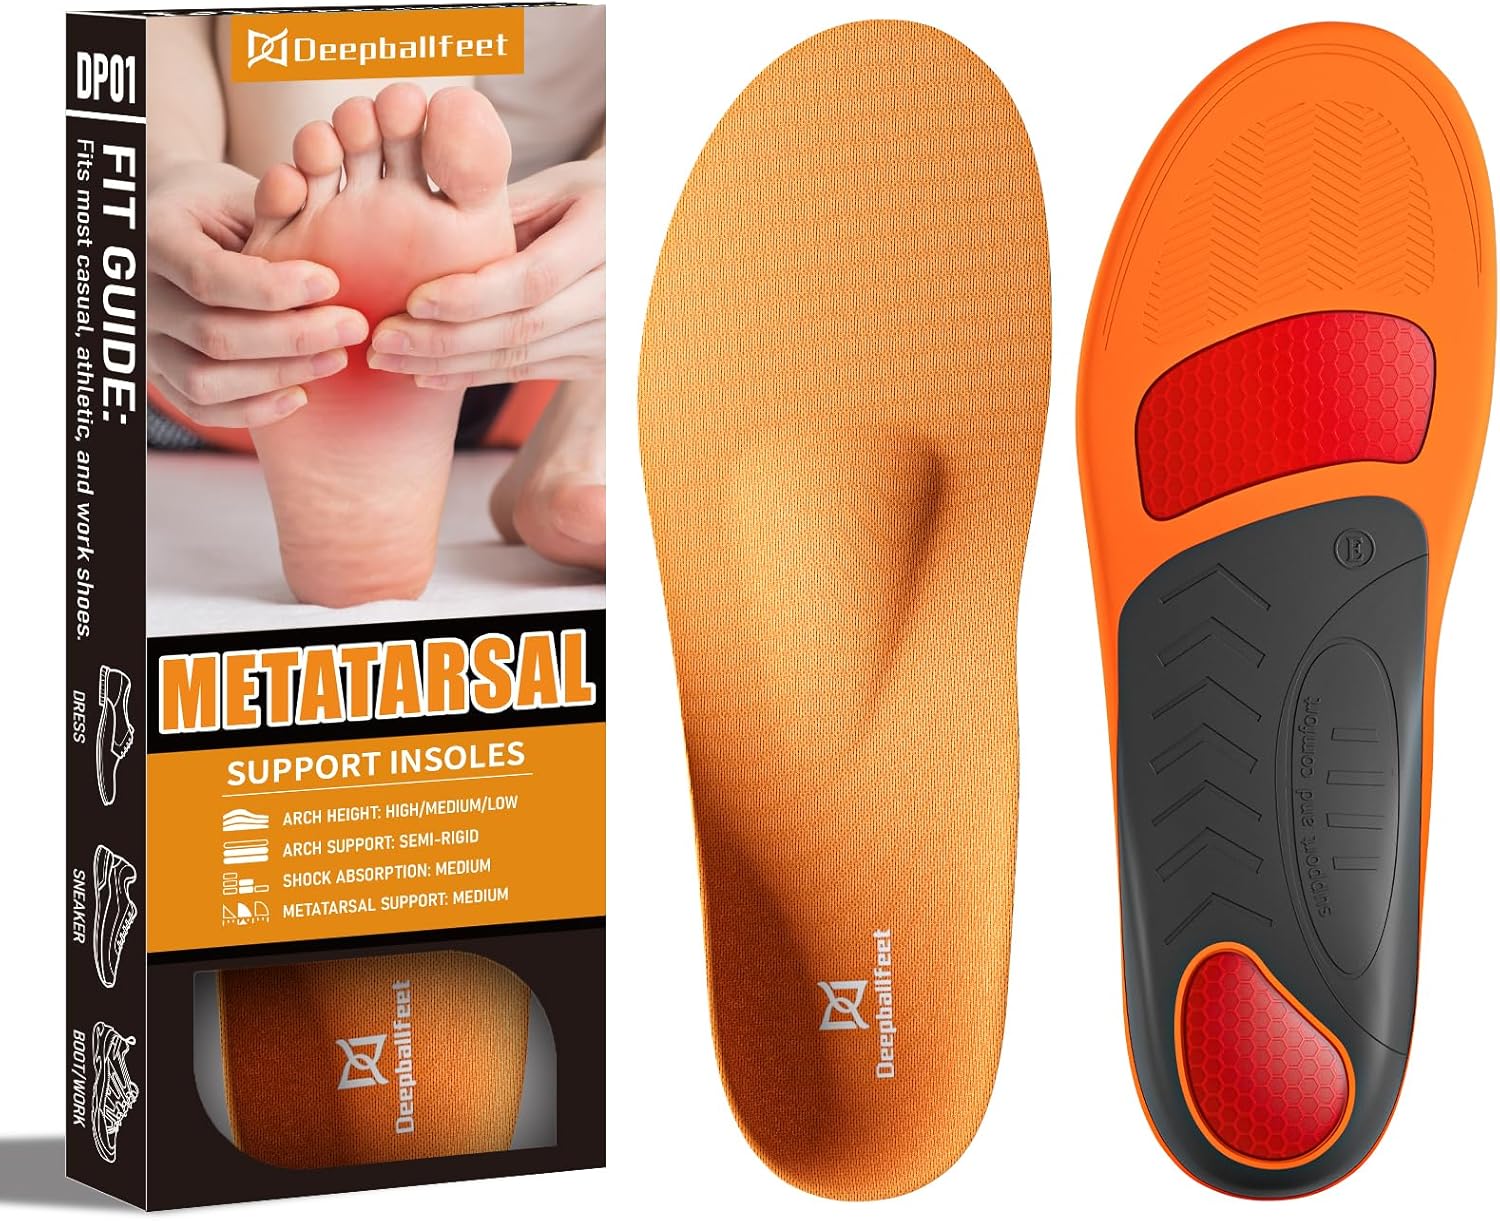
Choosing the Right Insoles
While these deep ball feet insoles are an excellent option, it’s important to remember that no insole or orthotic can serve as a standalone solution for foot pain. Instead, combining the right insoles with specific exercises can yield the best results.
Exercises to Alleviate Foot Pain
Here are three effective exercises to help alleviate foot pain. These exercises cater to various conditions and can be beneficial for most individuals.
1. Doming Your Arch
The first exercise focuses on creating an arch in your foot. Start by pulling your big toe towards your heel while maintaining contact with your big toe, little toe, and heel on the ground. This helps activate the medial longitudinal arch while also engaging the transverse arch.
Once you’ve mastered holding the domed position, try balancing on one leg for 30 seconds while maintaining the arch. This exercise strengthens the intrinsic muscles of your foot.
2. Calf Stretch
Next, stretching your calves is essential. If your calf muscles or ankles are too tight, they can lead to overpronation, causing the arch to flatten. To perform this stretch, start in the domed position and step forward with the other foot, ensuring your heel remains on the ground and your arch stays lifted.
Maintain this position for one minute before switching to the other side. This stretch will help improve flexibility in your calves and support your arches.
3. Splaying Your Toes
Finally, it’s important to practice spreading your toes. This exercise is particularly beneficial for individuals who wear tight shoes. Attempt to splay your toes apart like a fan, holding the position for five seconds before relaxing. Aim for 20 repetitions, even if the movement is subtle.
Conclusion: Taking the Next Steps for Healthier Feet
Insoles and exercises are essential components for addressing foot pain, especially for conditions like Morton’s neuroma. While you may experiment with different insoles, integrating targeted exercises into your routine can significantly enhance foot health. For more tailored advice on specific foot issues, consider consulting with a physical therapist who can provide personalized recommendations.